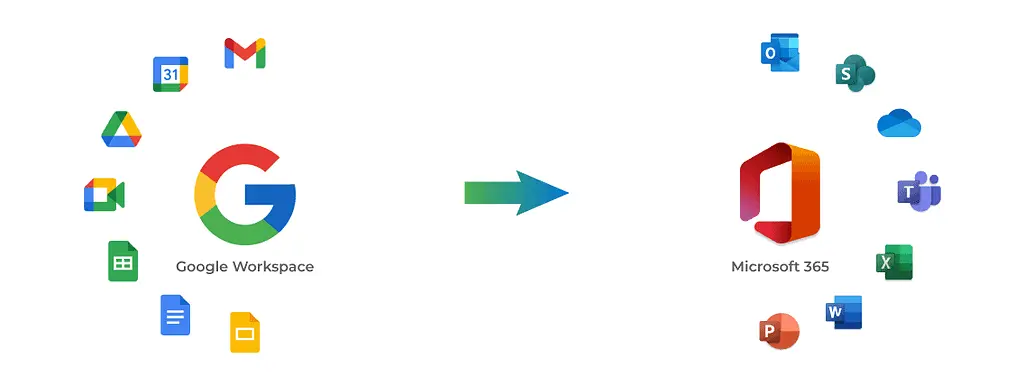
GOOGLE WORKSPACE TO MICROSOFT 365 MIGRATION
-
Jun, Fri, 2025
GOOGLE WORKSPACE TO MICROSOFT 365 MIGRATION
A Deep-Dive Step-by-Step Technical Guide – end-to-end Google Workspace to Microsoft 365 migration process
Introduction
Migrating from Google Workspace to Microsoft 365 is a common scenario for organizations aiming to leverage Microsoft’s integrated productivity and security ecosystem. This guide focuses on performing migration using the built-in Google Workspace migration feature in Exchange Online (EXO). It provides a complete, real-world deep dive—from prerequisites to post-migration validation.
Phase 1: Google Workspace – Pre-Migration Setup
Before initiating any migration, it’s critical to prepare the source environment (Google Workspace) properly.
Step 1: Ensure Super Admin Access in Google Workspace
To begin the migration, you must have a Super Administrator account in Google Workspace. This is essential because you’ll need to create and authorize a Google Cloud project, enable APIs, and grant domain-wide delegation permissions—tasks only possible with Super Admin rights.
Step 2: Log In to the Google Cloud Admin Console
⚠️ Note: Do not use the regular Google Workspace admin portal (admin.google.com). Instead, access the Google Cloud Console at console.cloud.google.com, which is required to set up the service account and enable API scopes.
Step 3: Create a Google Cloud Project for Migration
After logging into the Google Cloud Console, the next step is to create a dedicated project that will be used specifically for the migration process. This project acts as a container to manage all the APIs, credentials, and permissions needed.
How to create the project:
- In the Google Cloud Console (console.cloud.google.com), click the Project Selector dropdown near the top-left corner.
- Click New Project.
- Enter a name for your project. For clarity, you can name it something like:
- M365-Migration
- GoogleToMicrosoft365-Migration
- Or any descriptive name relevant to your organization.
- Select the Organization if applicable.
- Click Create.
Once created, this project will be the workspace where you enable the required APIs and create service accounts for migration.
Step 4: Enable Required APIs in Google Cloud Project
Once your Google Cloud project is created, you need to enable several APIs that allow Microsoft 365 to access the necessary Google Workspace data for migration.
Important APIs to enable include:
- Gmail API – To access users’ emails.
- Admin SDK – To read user and domain information.
- People API – To migrate contacts.
- Calendar API – To migrate calendar events.
- Drive API – If you plan to migrate Google Drive data (optional, based on scope).
How to enable APIs:
- In the Google Cloud Console, select your migration project.
- Navigate to APIs & Services > Library from the left-hand menu.
- In the search bar, type each API name one by one (e.g., “Gmail API”).
- Click the API from the search results, then click Enable.
- Repeat for all required APIs (Gmail API, Admin SDK, People API, Calendar API, Drive API).
Step 5: Create a Service Account and Assign Permissions
Now that your APIs are enabled, the next step is to create a Service Account. This account acts as a bridge between Google Workspace and Microsoft 365 during the migration process.
The service account must have Owner permissions within the project so it can access and manage the APIs you’ve enabled.
How to Create a Service Account:
- In the Google Cloud Console, navigate to IAM & Admin > Service Accounts from the left-hand menu.
- Click + CREATE SERVICE ACCOUNT at the top.
- Enter a name such as m365-migration-service.
- Optionally, provide a description (e.g., “Service account for Google to Microsoft 365 email migration”).
- Click Create and Continue.
Assign Project-Level Permissions
- On the next screen, under Grant this service account access to the project, select:
- Role: Owner
- Click Continue, then Done.
Note: Granting the “Owner” role gives the account full access to manage resources in the project. This is acceptable in a temporary project created just for migration, but for production environments, consider using the principle of least privilege.
Step 6: Disable the Organization Policy Restricting Service Account Key Creation (if enforced)
In some Google Workspace environments, there’s an organization policy that blocks the creation of service account keys. If this policy is enabled, you will see an error when trying to generate a JSON key for your service account.
❗ Common Error Message:
“The organization policy constraint constraints/iam.disableServiceAccountKeyCreation is enforced and prevents service account key creation.”
Solution: Disable the Policy iam.disableServiceAccountKeyCreation
To create the key successfully, you must first disable this constraint in the organization policy.
Required Role: Organization Policy Administrator
To make this change, your account must have the Organization Policy Administrator role.
How to Assign “Organization Policy Administrator” Role
- Go to IAM & Admin > IAM.
- Locate the user account you’re using for migration.
- Click the Edit icon (pencil) next to the user.
- Click Add Another Role.
- Search for and add:
- Organization Policy Administrator
- Click Save.
How to Disable the Policy:
Navigate to IAM & Admin > Organization Policies.
Click on the policy named:
If it shows “Enforced”, click Edit.
Choose “Not enforced”, then save.
Step 7: Create JSON Key and Configure Domain-Wide Delegation
With the organization policy unlocked, you can now generate the JSON key for your service account and configure it for domain-wide delegation, allowing Microsoft 365 to impersonate Google Workspace users during migration.
Create the Service Account Key (JSON)
- In the Google Cloud Console, go to IAM & Admin > Service Accounts.
- Click on the service account you created earlier (e.g., m365-migration-service).
- Go to the Keys tab.
- Click Add Key > Create new key.
- Choose JSON format.
- Click Create — the key file will be automatically downloaded to your local machine.
Important: Store this JSON key securely. You’ll use it in the Microsoft 365 Admin Center or via PowerShell to authenticate the migration process.
Step 8: Enable Google Workspace Marketplace OAuth Client Setting
Why this is needed:
Enabling the Marketplace OAuth Client setting allows the service account to be used as an authorized identity to access user data via domain-wide delegation.
How to enable:
- Still in the Service Account page, go to the Details tab.
- Click Show Advanced Settings.
- Toggle on the option for:
- “Enable Google Workspace Marketplace SDK”
- Then Enable OAuth Scopes / Domain-Wide Delegation
Step 9: Delegate Domain-Wide Authority to the Service Account
Now that your service account is ready and the key is generated, you must delegate domain-wide access through the Google Admin Console.
Sign in to https://admin.google.com using a Super Administrator account.
- Scroll down to Security – > API Controls -> Domain-wide delegation, and click Manage Domain Wide Delegation.
Click Add New.
Provide the following details:
- Client ID:
- Go back to your service account in Google Cloud Console, and copy the Client ID from the “Details” tab.
- OAuth Scopes (comma-separated list):
- These define what kind of data the service account is allowed to access.
- Recommended scopes for typical migration:
- https://mail.google.com/,
- https://www.googleapis.com/auth/gmail.readonly,
- https://www.googleapis.com/auth/admin.directory.user.readonly,
- https://www.googleapis.com/auth/calendar.readonly,
- https://www.googleapis.com/auth/contacts.readonly,
- https://www.googleapis.com/auth/drive.readonly
- Click Authorize.
What Does:
By completing domain-wide delegation, you authorize the service account to impersonate users in your domain and access their Gmail, Calendar, Contacts, and Drive data. This is what makes seamless user data migration to Microsoft 365 possible.
Phase 2 : Microsoft 365 – Pre-Migration Setup
Step 1: Prepare Microsoft 365 – Add and Verify Your Google Domain
To migrate mailboxes from Google Workspace to Microsoft 365, you must first add your organization’s domain (the one currently used in Google, like your domain.com) to your Microsoft 365 tenant. This ensures that Microsoft 365 recognizes the domain and allows user accounts to be created or matched.
Steps to Add and Verify Your Domain:
- Sign in to the Microsoft 365 Admin Center:
https://admin.microsoft.com - Go to Settings > Domains, then click + Add domain.
- Enter the domain you used in Google Workspace (e.g., yourdomain.com) and click Next.
- Microsoft will prompt you to verify ownership by adding a TXT record in your DNS provider (this is usually Google Domains, Cloudflare, or your domain registrar).
- After the TXT record is added, go back to Microsoft 365 and click Verify.
Step 2: Create Users and Assign Licenses in Microsoft 365
Once the domain is verified, you can begin preparing users who will be part of the migration.
Options:
- Manual User Creation – Add users one by one via the Microsoft 365 Admin Center.
- CSV Bulk Import – Upload a list of users if you’re migrating a large organization.
- Azure AD Connect or Directory Sync – If you’re syncing from an on-premises Active Directory.
For each user:
- Make sure the email address matches the one in Google Workspace (i.e., user@yourdomain.com).
- Assign a Microsoft 365 license that includes Exchange Online (e.g., Microsoft 365 Business Standard or E3/E5).
- Ensure their mailbox is provisioned (Microsoft auto-provisions after licensing).
Step 3: Configure Subdomains for Coexistence and Mail Flow Management
In some migration scenarios — especially staged migrations or when you want mail flow continuity between Google and Microsoft 365 — it’s best practice to set up subdomains on both sides. This setup helps route mail properly and avoid delivery failures while users are split across the two platforms.
Why Subdomains Are Needed
Subdomains help manage email routing and coexistence in scenarios where:
- You’re migrating users in phases (some users remain on Google while others move to M365).
- You want to test mail flow or mailbox setup in Microsoft 365 before fully cutting over.
- You need to maintain split delivery or dual delivery
- You’re performing a pilot migration before the full move.
You don’t need subdomains if you’re doing a full cutover migration (all users moved at once, and the domain’s MX records are switched completely to Microsoft 365 at the end).
Subdomain Setup – Google Workspace Side
Let’s say your main domain is domain.com.
You create a subdomain like:
gsuite.domain.com for use within Google Workspace.
Steps:
- In your DNS provider (like Google Domains or Cloudflare), add the subdomain:
- TXT record for domain verification in Google.
- Go to Google Admin Console > Domains > Manage Domains, then click Add a domain or alias. (Add it as an Alias Domain if you want users in Google to receive emails addressed to both user@domain.com and user@gsuite.domain.com.)
- Add gsuite.domain.com as a secondary domain, not an alias.
- Verify using the TXT record.
- Add MX Records for Google Side – Only set the MX records for gsuite.domain.com pointing to Google’s mail servers
- Important: Do not change the MX records for your root domain yet (com).
Subdomain Setup – Microsoft 365 Side
Now, for Microsoft 365, create a matching subdomain like:
m365.domain.com
Steps:
- Go to Microsoft 365 Admin Center > Settings > Domains, then click Add domain.
- Enter m365.domain.com and click Next.
- Since the primary domain domain.com is already verified, Microsoft 365 will automatically verify the subdomain using inherited TXT records — no need to add a new TXT.
- Add MX Records for M365 Side – Only set the MX records for m365.domain.com pointing to Microsoft 365
Why This Works
With this setup:
- Mail for users still on Google continues to flow via gsuite.domain.com.
- Mail for users already migrated goes through m365.domain.com.
- You can configure routing rules (or connectors) on both platforms to forward mail to the correct destination based on the user’s location.
This method prevents mail loops, delivery failures, and confusion during the transition period.
Scenario | Need Subdomain | Why? |
Full cutover (all users moved at once) | No | Just point MX to Microsoft 365 after migration. |
Staged migration (users moved in batches) | Yes | Helps route mail correctly between platforms. |
Coexistence with dual mail systems | Yes | Enables split delivery and smart routing. |
Pilot migration before org-wide move | Yes | Isolates testing without impacting production users. |
Step 4 : Add Subdomains as Alias Domains and Configure Proxy SMTP Addresses
In addition to adding subdomains for coexistence and routing, you need to assign them as alias domains to ensure proper delivery when emails are sent or forwarded using alternate addresses.
Phase 3 Create a Migration Endpoint in Exchange Online (EXO)
The Migration Endpoint is the connection configuration Microsoft 365 uses to securely access and extract data from Google Workspace mailboxes. This endpoint leverages the JSON key, service account, and OAuth scopes you’ve previously set up.
Prerequisites:
Before you create the endpoint, make sure you have:
- The JSON key file downloaded from Google Cloud Console.
- Domain-wide delegation set up and authorized in Google Admin Console.
- Users created and licensed in Microsoft 365.
- PowerShell ready (for advanced scenarios) or access to Microsoft 365 Admin Center.
Step 1 Create Migration Endpoint via Microsoft 365 Admin Center
- Go to the Microsoft 365 Admin Center → Exchange Admin Center:
https://admin.exchange.microsoft.com - Navigate to:
Migration > Migration Endpoints - Click + Add migration endpoint.
- Choose Google Workspace (Gmail) as the migration type.
- Upload your service account JSON key file.
- Enter the required details:
- Email Address for Test – A test user from Google Workspace (e.g., user1@domain.com) to validate access.
- Click Next and validate the connection.
- Give the endpoint a name (e.g., Google-MigrationEndpoint) and click Save.
Step 2 : Create and Manage Migration Batches in Microsoft 365 (Exchange Admin Center)
Now that the migration endpoint is set up and alias subdomains are configured, you’re ready to begin migrating users from Google Workspace to Microsoft 365.
This is done by creating migration batches, which are groups of users that will be migrated together. You can do this using the Exchange Admin Center (GUI) or via PowerShell.
Create Migration Batches via Exchange Admin Center (EAC)
- Go to:
https://admin.exchange.microsoft.com - Navigate to:
Migration > Batch - Click + Add migration batch.
- Choose Google Workspace (Gmail) as the migration type.
- Upload a CSV file with the users you want to migrate.
- Select the migration endpoint you created earlier.
- Name the batch (e.g., Batch-GoogleWave1).
- Configure options:
- Choose to start manually or automatically.
- Select a recipient for migration notifications.
- Auto-complete or manually finalize the batch later.
Monitoring the Batch
After creating the batch:
- Go to Migration > Batch to track its status.
- You’ll see details like:
- Total users
- Synced users
- Errors or failures
- Sync percentage
- You can restart, complete, or delete the batch from here.
Finalizing the Migration
Once you confirm mail has synced and users are active in Microsoft 365:
- Use Complete-MigrationBatch to finalize:
Then, switch the MX records of your root domain (domain.com) to Microsoft 365 mail servers.
Enable Throttling Override in Microsoft 365 to Improve Migration Speed
To prevent performance issues during large migrations, Microsoft throttles workloads like mailbox moves. However, for planned and approved migrations (like Google to Microsoft 365), you can temporarily bypass these throttling limits using Service Request-based throttling override.
Why Enable Throttling Override?
- Increases concurrent mailbox moves
- Reduces delays in mailbox sync
- Ideal for bulk migrations or tight migration timelines
Post-Migration Checklist
- MX switched
- Test mail flow (inbound/outbound)
- Outlook profile recreated (via Autodiscover)
- Mobile devices reconfigured
- Remove aliases from Google if needed
- Turn off Google MX (after 48–72 hours buffer)
Migration Limitations Matrix
Category | Limitation |
– Vacation responders / auto-replies are not migrated. – Gmail labels become Outlook folders; nested labels may flatten. – Read/unread, starred, and importance flags may not consistently transfer. – Delegated access, Send As, Send on Behalf permissions are not retained. – Gmail categories (Primary, Social, Promotions) are not supported in Outlook. – Messages over 150MB (including attachments) are skipped. | |
Calendar | – Google Meet links stop working post-migration. – Recurring events may lose recurrence patterns or attendee statuses. – Colors, reminders, and calendar sharing permissions do not carry over. – Shared calendars must be manually re-shared. – Conference room links and locations may be lost. |
Meeting Rooms / Resources | – Room and equipment bookings are not migrated. – Must be manually recreated and rebooked in Microsoft 365 (Exchange Online). |
Contacts | – Only three email addresses per contact are migrated. – Photos, notes, tags, custom fields, and URLs are often dropped. – Contact Groups (distribution lists) require manual export/import and recreation. |
Mail Rules (Filters) | – Gmail filters may convert, but Outlook rules are inactive by default. – Some conditions/actions (e.g., smart labels) don’t have Outlook equivalents. – Users must manually re-enable or recreate rules. |
Drive / Shared Drives | – Google Drive files are NOT migrated by default. – Shared Drive content and permissions require third-party tools (e.g., Mover, CloudM, or ShareGate). – Versioning, comments, and share links may be lost. |
Chat / Google Spaces | – No native migration to Microsoft Teams. – Chat logs, threads, and Spaces must be archived/exported manually if needed. |
Google Groups | – Groups must be manually recreated as Distribution Lists or Microsoft 365 Groups. – Memberships and permissions are not retained. |
Tasks & Notes | – Google Tasks and Keep Notes don’t migrate. – Use Microsoft To Do and OneNote as alternatives. – Manual or third-party export/import is required. |
Third-Party Add-ons | – Gmail/Workspace Marketplace add-ons do not transfer. – Microsoft 365 has equivalents but must be manually configured post-migration. |
Audit Logs / Vault | – Google Vault data, audit logs, and holds are not migrated. – Set up Microsoft Purview Compliance Portal separately for eDiscovery, retention, and auditing. |
Conclusion & Final Thoughts
Migrating from Google Workspace to Microsoft 365 using Google Workspace Migration in Exchange Online (EXO) is a powerful and structured process — but one that requires careful planning, the right permissions, and an understanding of both platforms’ differences.
In this guide, I have covered:
- Preparing your Google environment (APIs, service accounts, delegation)
- Setting up Microsoft 365 (domain verification, licensing, aliasing)
- Mail flow coexistence via subdomain configuration
- Batch migration setup and performance tuning (e.g., throttling override)
- Limitations and data types that don’t migrate (Drive files, Chat, Filters, etc.)
Next Steps After Migration
- Verify full mail delivery post-cutover
- Reconfigure Outlook profiles and mobile email clients
- Rebuild any shared calendars, permissions, or groups as needed
- Review Microsoft Purview compliance, retention, and eDiscovery setup
- Decommission legacy services (Google Vault, Drive, Groups) if no longer needed

As a seasoned Engineer – Systems, I bring over 4 years of hands-on expertise in IT system administration, support, and management. Armed with a solid foundation from London Metropolitan University, where I earned my Bachelor of Engineering degree in Network and System, and further fortified by certifications from multiple venders, I am well-equipped to navigate the dynamic landscape of technology.